| Kanto Walkthrough | ||
 |
||
| Region
Kanto
|
Difficulty
Medium
|
Compulsory?
Yes
|
|
||
| Requisites
None.
|
||
|
Main article: Kanto
Kanto is one of the mainland regions that are currently playable in Pokémon Revolution Online. It is unified to the same mainland continent as Johto, encompassing the eastern segment of it.
By virtue of the regional linearity of the game’s storyline wherein regions are traveled to in generational succession, it is the first region that players venture into. It is the predecessive region of Johto, which will be made travelable after all-eight badges have been acquired and its Elite Four bureau has been vanquished.
It is inhabited predominantly by Generation I Pokémon, being the native land for them. While a smattering of post-generational Pokémon are interspersed throughout the wild, Generation II Pokémon and onwards will be mostly inacquirable until successive regions are completed, since there is a regionalized restriction to trading early on wherein only Pokémon caught from the region are tradable in its Pokémon Centers.
Kanto is the only region that is interlinked with the Sevii Islands, exclusively allowing donating members to ferry to the archipelago from Vermilion City Harbor.
Introduction
Welcome to PRO!
Once you start a new game on any of the two servers, you will be greeted by Professor Oak. From here you can design your character; please note, you cannot change your character’s appearance without buying the Magic Mirror from the coin shop. So chose wisely.
Once you have chosen your character you will be spawned into the intro world. Follow the dirt path south until you reach Oak; talk to him then continue the path. Eventually, you will reach Mew, it will flee and you can continue the path. Once you reach your mother she will start crying about how much she will miss you, once her dialogue is over you will be teleported to Pallet Town.
Pallet Town
Once you spawn in Pallet Town you should leave your home and walk to Professor Oak’s Lab, which is at the Southeast of your home. Once there you will be given the option to chose your starter Pokémon. You will also be given your Pokédex.
When choosing your starter you have 4 options : Squirtle, Bulbasaur, Charmander and Pikachu.
Notes :
- In order to choose Pikachu you must click ‘No.’ on all three starters.
- By choosing Pikachu you unlock an extra side quest where you are able to obtain Ash’s hat.
After choosing your starter you can exit Oak’s Lab and return home.
Talk to your mother then go upstairs and pick the two items on the floor. You will receive 5 Pokéballs and 5 Potions.
Now, leave your house and walk outside. You will notice an Eevee with an orange name. Talk to it and you will trigger a scene with Jackson, your rival.
Talk to Jackson to battle him. If you lose a battle you will drop 5% of your money.
Once you finish the fight you should continue North to Route 1.
Route 1
Now that you have left Pallet Town you must continue North, to Viridian City. On your way, you can talk to the NPC with the brown coat for a free potion.
There are also 3 hidden potions behind a tree.

Tips: It is recommended to catch a Sentret, which will be useful later on.
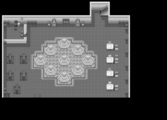
Viridian City
Once you enter Viridian, the first thing you will see is a Rare Candy. This Rare Candy will respawn once every 7 days.
There is also Madeline, found roaming the southeasternmost segment of the city, who is willing to trade her level-5 Oddish in return for a Pidgey that has 15 IVs or more in Speed and Attack.
If you chose Charmander or Pikachu this trade will greatly help with the first gym.
Before you continue the story, training your Pokémon to around level 10 is recommended. Use Route 22 to train your Pokémon.
Once you are ready for Jackson, enter the school building and go to the lower floor. Confront Jackson and you will battle him. His Eevee is now level 8.
- If you lose to Jackson then you will have to talk with the Receptions and then return to Pallet Town and ask his mom to come and move him. His house is the one next to yours.
- If you beat Jackson then you are free to move on to Viridian Forest. Head North to Route 2 and continue until you reach the stop house.
Officer Jenny’s bounties
Officer Jenny is an NPC that gives small quests, or ‘bounties’. Found next to the Pokémon Center, she gives three different bounties:
- Defeat Bug Catcher Gerald, found in the northeast of Viridian Forest. If he was already defeated prior to accepting the bounty, he will be made available to fight again. The reward for completing this bounty is
 3,000.
 - Clear Route 1 of Rattata. The bounty requires you to obtain 3 Rattata Hair, an held item by Rattatas on Route 1 only. Simply defeating them is not enough, it is necessary to either catch them or use a stealing move like Thief or Covet. When accepting the quest, she will give TM96 (Thief), giving you the opportunity to complete the quest without finding a Pokémon that can learn item steal moves naturally. The reward for completing this bounty is
 7,000.
 - Catch a Sentret. As the quest states, you must simply capture a Sentret and show it to Officer Jenny. The reward for completing this bounty is
 7,500.
You can accept multiple bounties at a time, but each bounty can only be completed once.
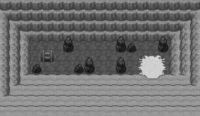
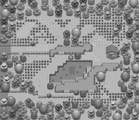
Viridian Forest
Main article: Viridian Maze
When you’re in Viridian Forest you will find Viridian Maze. The entire maze is pitch black so you will need HM05 (Flash) to go through it.
Outside of the maze is a boy who has lost his Pidgey to a Team Rocket Grunt. Accept his quest and go into the maze.
After defeating the Rocket Grunt you can return to the boy and you will receive 15 Pokéballs and an Escape Rope as a reward.
Once you’ve done everything you can in the maze, start to make your way through the forest. Make sure to battle all the trainers as they’re a good source of EXP.
Tips: If Pikachu was not chosen as a starter, it is recommended to catch a Pikachu, which will be useful later on.
After you reach the end of the forest you will exit on Route 2. Use the tall grass here to train your Pokémon to level 15 if they aren’t already.
Move Tutor
Headbutt can be taught from the Move Tutor hiding in the southwest corner of Viridian Maze, it will require Pewter City‘s Boulder badge and will cost  2,000.
This move can be used to interact with headbutt trees. Each tree will either give a berry, a wild Pokémon, or nothing.
(The use of Headbutt requires the Pokémon knowing the move to have 150 or more Happiness.)
Abandoned Pokémon
In the southeast corner of the maze, an abandoned Pokémon Pokéball is claimable. It will yield either Growlithe, Horsea, or Bellsprout, all at an equally apportioned rate, thereby providing one of the earliest-accessible avenues for obtaining any of these Pokémon. The Pokémon will be of level 7.
The acquisition of this Pokéball is highly recommendable, as two of its eventualities are type-advantageous against the Rock and Ground-type Pokémon deployed by Brock in Pewter Gym.
| Pokédex Number | Pokémon | Type 1 | Type 2 | Rarity Tier | Held Item | |
|---|---|---|---|---|---|---|
| #058 |  |
Growlithe | Fire | Uncommon | ||
| #116 |  |
Horsea | Water | Common | ||
| #069 |  |
Bellsprout | Grass | Poison | Common |
TM23 (Dragon Rage)
| Item | Quantity | Cooldown | Location | |
|---|---|---|---|---|
 |
TM23 — Dragon Rage | 1-2 | 14 days | On the eastmost dead-end of the maze. |
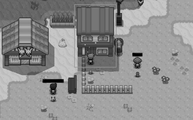
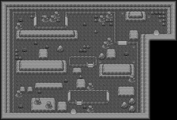
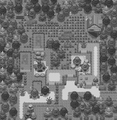
Pewter City
There isn’t much to do in Pewter City except for defeating the gym and Officer Jenny’s bounties. Once you enter the city you will be greeted by Team Rocket outside of a Pokécenter.
Officer Jenny’s bounties
Just like in Viridian City, there is an Officer that gives small quests called ‘bounties’. Found directly to the west of the Pokémon Center, she gives the following bounties :
- Beat Brock: This bounty requires you to go defeat Brock, the gym leader of Pewter City. If Brock was already defeated prior to accepting the bounty, simply retalking to Officer Jenny will complete the bounty. The reward for completing this bounty is
 1,250 and a Hard Stone.
 - Catch a Pikachu and show it to Officer Jenny. The starter Pikachu can also be shown for the quest, but if Pikachu was not chosen as a starter, they can be found in Viridian Forest. The reward for completing this bounty is
 3,500 and a Thunder Stone.
 - Teach a Pokemon Headbutt: Show Officer Jenny any pokemon that knows the move Headbutt. The reward for completing this bounty is
 5,000, more than enough to refund the Headbutt Tutor price.
- Catch a Silcoon: Continuation of the Headbutt quest, this extra-bounty requires you to catch a Silcoon. Early in the game, they can be found by headbutting trees in many areas. The reward for completing this bounty is
 9,000.
- Catch a Silcoon: Continuation of the Headbutt quest, this extra-bounty requires you to catch a Silcoon. Early in the game, they can be found by headbutting trees in many areas. The reward for completing this bounty is
Since both Pokémon deployed by Brock are dual-type Rock and Ground Pokémon, they are susceptible to a multiplicatively stacked 4x weakness to Water and Grass type attacks. As such, you are advised to use those Pokémon types against him.
|
|||||||||||||||||||||||||||||||||||||||||||||||||||||||||
|---|---|---|---|---|---|---|---|---|---|---|---|---|---|---|---|---|---|---|---|---|---|---|---|---|---|---|---|---|---|---|---|---|---|---|---|---|---|---|---|---|---|---|---|---|---|---|---|---|---|---|---|---|---|---|---|---|---|
|
|||||||||||||||||||||||||||||||||||||||||||||||||||||||||
|


After beating Brock he will reward you with the Boulder Badge.
By receiving the Boulder Badge you can now use Headbutt and Flash outside of battle if your Pokémon has 150 happiness or more.
You also can buy TM34 (Bide) from the man near the entrance.
When you leave the gym you will talk to Red for the first time.
Route 3
Again, there isn’t much to do on Route 3 except for fighting a load of trainers.
Once you reach the Pokécenter on the other side, you can enter it and purchase a Magikarp.
Outside at the entrance to Mt. Moon, there is a salesman who will sell you 5 Escape Ropes for  2,000. You save
  500 with this deal.
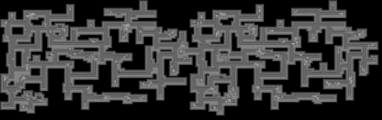
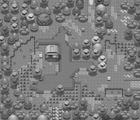
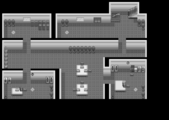
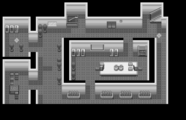
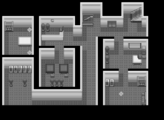
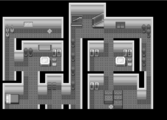
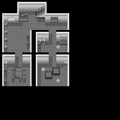
Mt. Moon
Main article: Mt. Moon
Mt. Moon can be a bit of a maze to newer players. When trying to get to the other side you should avoid the first 2 ladders as they only lead you to dig spots.
Instead, continue on the first floor until you reach the ladder at the end.
You can also find a free Moon Stone which can be useful later on.
-

Mt. Moon 1F
-
Mt. Moon B1F
-

Mt. Moon B2F
-
Mt. Moon Exit
Continue walking through until you reach Mt. Moon B2F, defeat the Rocket Grunts and talk to the scientist.
He will battle you for the fossils that he found. After defeating him you are allowed to chose one to keep.
- On the left is the Helix Fossil which gives you Omanyte and on the right is the Dome Fossil which will give you a Kabuto.
After you take a fossil you can walk forwards a little and battle Jesse and James. After you defeat them you can continue to the exit.
Route 4
There isn’t much to do on Route 4 except for battling a few trainers, some tutors, and headbutting a few trees. Continue walking East until you reach Cerulean City.
- There are berry trees for some Leppa Berry and Lum Berry.
- A Move Tutor for Mega Kick and Mega Punch can be found here. Additionally, there is a ground-lootable Mega Kick TM.
When you get to Cerulean City heal your Pokémon and walk North to Route 24.
Route 24 & 25
Once you defeat all the trainers you can progress to Route 25 where you will meet a Team Rocket Grunt.
Talk to him and you will receive a free Nugget and a surprise battle.
After beating him, start to walk East. Defeat the trainers and arrive at Bill’s house.
Once inside, talk to Bill and he will ask for your help.
He has lost his research book and if you can find it for him he will reward you.
- His research book is under his pillow, take it and talk to Bill again to receive your reward: a ticket to the SS Anne.
Note: one of the Item Maniac‘s house is on the right, near Bill’s place.
This NPC allows us to trade certain items and trinkets for a good amount of money.
You can sell the Nugget for  15,000.
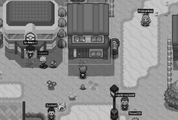
Cerulean City
After you return to Cerulean City you should start to train your Pokémon to around level 25.
Use the trainers from the nearby routes and the tall grass on Route 24 to help level them.
Officer Jenny’s bounties
Just like in Pewter City, there is an Officer that gives small quests called ‘bounties’. Found directly to the west of the Pokemon Center, she gives the following bounties:
- Effort train a Pokémon: This bounty requires you to do a little bit of EV training on any of your Pokémon. The complete condition is for a Pokémon to have at least one stat that has 50 more EV points than its lowest stat, as well as that the Pokémon has been caught by you. As Jenny suggests, this can easily be done on the specialized EV training location, Route 24. The reward for completing this bounty is
 10,000.
 - Teach a Pokemon Dig: This bounty requires you to show Officer Jenny any Pokémon that knows the move Dig. The quest can be completed early by using the TM28 (Dig) obtained after defeating the Burglar in Cerulean City. The reward for completing this bounty is a Soft Sand.
- Dig up a Gem: Continuation of the Dig quest, this bounty requires you to dig up at least two different kinds of Gem items. This can easily be done by digging all patches at Route 3 and Mt. Moon. These gems are not lost upon completing the quest. The reward is a Big Pearl, which can be turned in for
 9,000 at the nearby Item Maniac.
- Dig up a Gem: Continuation of the Dig quest, this bounty requires you to dig up at least two different kinds of Gem items. This can easily be done by digging all patches at Route 3 and Mt. Moon. These gems are not lost upon completing the quest. The reward is a Big Pearl, which can be turned in for
- Catch a Cute Clefairy: This bounty requires to catch a Cute Charm Clefairy, which also has to be caught by you. These can easily be found in Mt. Moon, but you must pay attention to the ability the Clefairy has. The Clefairy is not lost upon completing this part of the quest. The reward for completing this bounty is
 6,000.
- Deliver the Clefairy: Continuation of the Clefairy quest. Officer Jenny will ask you to deliver the Clefairy to Laila in Vermilion City‘s Library. The Clefairy does not have to be the same as shown to Officer Jenny but must follow the same conditions. It will also be lost, so it is recommended to give a Clefairy that you do not want to keep anyway. Laila will reward the player with 2 Rare Candies, and returning to Officer Jenny afterward to complete the bounty will reward you with
 4,000.
- Deliver the Clefairy: Continuation of the Clefairy quest. Officer Jenny will ask you to deliver the Clefairy to Laila in Vermilion City‘s Library. The Clefairy does not have to be the same as shown to Officer Jenny but must follow the same conditions. It will also be lost, so it is recommended to give a Clefairy that you do not want to keep anyway. Laila will reward the player with 2 Rare Candies, and returning to Officer Jenny afterward to complete the bounty will reward you with
TM28 (Dig)
Dig is acquired for free at Cerulean House 6.
Gym
Once you feel like your Pokémon are strong enough you can challenge the gym.
Misty uses Water-type Pokémon, so you are advised to use Grass-type or Electric-type Pokémon against her.
|
|||||||||||||||||||||||||||||||||||||||||||||||||||||||||||||||||||||||||||||||||||||
|---|---|---|---|---|---|---|---|---|---|---|---|---|---|---|---|---|---|---|---|---|---|---|---|---|---|---|---|---|---|---|---|---|---|---|---|---|---|---|---|---|---|---|---|---|---|---|---|---|---|---|---|---|---|---|---|---|---|---|---|---|---|---|---|---|---|---|---|---|---|---|---|---|---|---|---|---|---|---|---|---|---|---|---|---|---|
|
|||||||||||||||||||||||||||||||||||||||||||||||||||||||||||||||||||||||||||||||||||||
|


After defeating her you will be rewarded with the Cascade Badge which gives you the ability to use HM01 (Cut) outside of battle.
You can also purchase Bubble Beam from the man at the front of the gym.
Route 5 & 6
Main article: Daycare centers
After defeating the Cerulean gym you should continue south to Route 5. You will find the Daycare Center however it’s good to note that breeding is not in PRO.
Instead, the Daycare is used to teach your Pokémon Egg Moves after defeating the Naero boss.
At the end of Route Route 5, you will find this underground passage. Use it to travel to Route 6 where you can continue the story.
Once you arrive at Route 6 you will be able to battle a few trainers.
Make your way to the entrance to Vermilion City and talk to Psychic Wade. He will teleport you to an alternate reality where Lance has destroyed Vermilion City.
Confront Lance and you will be engaged in a battle with him. He will use his Dragonair which spams Hyper Beam, slowly eliminating each one of your Pokémon.
After he beats you, you will be teleported to the Vermilion Pokécenter.
Rush back to Wade and talk to him, after you finish talking to him you can progress to Vermilion City and the SS Anne.
S.S. Anne
To start the SS Anne quest you will first need to talk to Lt. Surge at the Vermilion Docks.
[
He will return to his gym and you will be able to enter the cruise ship. If you didn’t get the SS Anne ticket from Bill then you will have to walk all the way back to Route 25 and complete his quest.
When you enter the SS Anne, talk to the Usher and he will escort you to your room. Log in to the PC next to your bed and he will move from your doorway.
- Whenever your Pokémon need healing you should come back to your room and interact with your bed.
As you continue you can go into each room of the ship and battle trainers. To maximize your EXP and your data-seen, it is recommended that you battle all of the trainers on the ship.
Make your way to the first floor and enter the kitchen located on the far left.
Make sure you have a Pecha berry to give to the doctor. (If you don’t have one in your inventory then there will be one in a trash can).
Talk to the doctor in the kitchen and offer to help him cure the captain. When you show him the Pecha berry he will tell you to go the second floor and meet Jenson.
Go to the second floor and enter the room on the far right.
In here you can talk to Jenson who will ask you to find his Blissey in the ballroom as it holds the secret potion.
Make your way upstairs again. From there you have the option to beat Jackson again. You might as well as it’s some free EXP and he probably deserves it.
Continue to the ballroom and head to the upper floor where you will find Jenson’s Blissey. Talk to it and it will disappear and leave you with the secret potion.
Now you can return to the second floor and find the captain. On the way there you can pick up some leftovers from this trash can.
Once you get to the captain’s quarters you can give him the potion in return for HM01 (Cut). You can now leave the SS Anne and fight the Vermilion gym.
Note: You cannot return to the SS Anne after leaving.
Vermilion City
Old Rod
When exploring Vermilion you can go inside this house and receive a free Old Rod. You will need to collect this in order to gain access to the Good Rod and eventually the Super Rod.
-
Old Rod’s House
Bike Voucher
You can also enter the house next to the Pokécenter and help the boy.
-
Samuel’s House
Upon paying him  60,000 and giving him an Ditto, Samuel will thank you by giving you the bike voucher. You can trade this voucher in at the Cerulean City Bike Store to receive your bike and gain access to the bike route.
- Ditto’s Locations
Gym
Due to an occlusive tree in the passageway of the gym’s entryway, HM01 (Cut) and either a Cut-toting Pokémon or a Tree Axe is required to reach the gym.
In order for Lt. Surge to be reachable, the electropad barriers must be deactivated; they will occlude the pathway to him until then.
Once you finally find both correct switches you will be able to progress and battle Lt. Surge.
The sequential combination is randomized for each player out of the 15 switches and it will remain constant until the puzzle is completed; as such, it may entail a trial-and-error run to deduce the correct combination. If you have a mismatch, simply activate the initial switch correctly and try a secondary switch in tandem.
As an Electric-type specialist, Ground-type Pokémon will be the most type-advantageous against his Pokémon. With a Ground-type Pokémon on-hand and/or one with a powerful Ground-type move to deploy, it is generally easy to trounce Lt. Surge’s lineup—both due to their Electric-type immunity and his Pokémon’s defensive weakness against Ground-type attacks.
If you have not already claimed the one-off TM28 (Dig) from the burglarized house in Cerulean City, you are advised to do so and teach it to one of your Pokémon (especially a Ground-type Pokémon), which are abundantly encounterable in Mt. Moon.
Tips: It is recommended to train your Pokémon up to around level 35.
|
|||||||||||||||||||||||||||||||||||||||||||||||||||||||||||||||||||||||||||||||||||||||||||||||||||||||||||||||||
|---|---|---|---|---|---|---|---|---|---|---|---|---|---|---|---|---|---|---|---|---|---|---|---|---|---|---|---|---|---|---|---|---|---|---|---|---|---|---|---|---|---|---|---|---|---|---|---|---|---|---|---|---|---|---|---|---|---|---|---|---|---|---|---|---|---|---|---|---|---|---|---|---|---|---|---|---|---|---|---|---|---|---|---|---|---|---|---|---|---|---|---|---|---|---|---|---|---|---|---|---|---|---|---|---|---|---|---|---|---|---|---|---|---|
|
|||||||||||||||||||||||||||||||||||||||||||||||||||||||||||||||||||||||||||||||||||||||||||||||||||||||||||||||||
|


Upon beating him you will be rewarded with the Thunder Badge and you’ll be able to buy TM24 (Thunderbolt) from the man at the entrance.
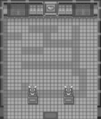
Diglett’s Cave
After you are done in Vermilion, head East to Route 11. Here you can talk to a Karate Expert outside of Diglett’s Cave and he will move out the way.
Enter the cave and follow it through to Route 2. Once there you should head South to the stophouse.
Talk to Oak’s aide and he will check your Pokédex. You need to have caught 10 different species of Pokémon.
- /dex or /pokedex : It prints your Pokédex data in the chat, specifying your seen-, caught- and evolved-data entries.
Now that you have HM05 (Flash) you can go back to Cerulean City and go East to Route 9.
Rock Tunnel
After traveling through Route 9 and beating the trainers there, you will have to enter Rock Tunnel. However, similar to Viridian Maze, Rock Tunnel is pitch black so you will have to teach one of your Pokémon HM05 (Flash).
To use Flash outside of battle you have to, first, click the Pokémon in your party and then click the move ‘Flash‘.
Now your vision should be a lot better.
Follow the cave though, it’s mostly linear but if you are having issues finding the correct ladders then here they are in order.
-
Rock Tunnel 1
-
Rock Tunnel 2
Once you escape Rock Tunnel, head South to Lavender Town. Upon arrival you will hear two guards talking about crime in Celadon City.
Since you cannot do anything in Lavender Town yet you must go West to Route 8.
Route 7 & 8
There are a lot of trainers on Route 8 which means there is a lot of EXP and data-seen to be gained.
There is also a hidden abandoned Growlithe behind this tree.

After beating the trainers on Route 8 go to the underground tunnel and continue East to Route 7.
There is nothing interesting on Route 7 so continue to Celadon City.
Celadon City
When you arrive at Celadon City the first thing you might notice is Sergeant Rick. Team Rocket has already commandeered a secret hideout, as they have used Celadon Gaming Corner’s substories as a surreptitious operational base and Rick needs help infiltrating it.
To start the quest you need to offer your help.
Enter the Gamecorner and talk to Greg. He will lead you downstairs.
Once you are downstairs, talk to Greg again and he will leave. However, clumsily, he will forget his lift key. Pick it up and use the lift at the bottom of the hideout.
Go to B2F where you will meet Jackson. Fight him and defeat him in a battle.
-

Celadon Rocket Hideout B1F
-
Celadon Rocket Hideout B2F
-
Celadon Rocket Hideout B3F
-
Celadon Rocket Hideout B4F
When you beat him he will get really upset and alert Team Rocket of your whereabouts. Walk around and you will be captured by Team Rocket.
Whilst in this room you can use the crates to hoist yourself over the wall and attempt an escape.
Note: If a Team Rocket member sees you then you will be transported back to where you started.
In B2F there is a large maze with some items scattered around it. Go through the maze, following the red arrows, and exit the maze with the green arrow.
Once you collect all the items go down the second flight of stairs to B3F and fight Greg.
After you beat him go through the smaller maze and down the staircase. Once you’re in B4F defeat the Supervisor to get the Card Key.
Go back upstairs to B2F and through the large maze again. Take the lift to B4F and use the Card Key on the hidden door.
Fight Giovanni and after you defeat him he will run from the building.
You can now pick up the Silph Scope from Giovanni’s table. You now need to look in each receptor for an Eevee.
There are 2 receptors in Giovanni’s room, 1 on the other side of B4F and 2 more on B3F.
After you find the Eevee you can now leave the Celadon Gaming Corner and talk to Sergeant Rick. He will reward you for your hard work with the Eevee that you just saved.
Now that you’ve beaten Giovanni you can talk to these Team Rocket members and they will run from the city.
You now have access to the Celadon gym.
Officer Jenny’s bounties
Just like in Cerulean City, there is an Officer that gives small quests called ‘bounties’. Found in the square in front of the Department Store, she gives the following bounties:
- Fight Michael: This bounty requires you to fight Michael in Route 17. By his location, it will be necessary for the player to obtain a Bicycle first. Michael will be staying near the north exit of the route. Once spoken to, he will fight you with a team of 4 Pokemon of a level close to 35. These Pokemon also all hold items to go along with their moveset or ability. Once defeated, Michael will disappear and the player will be able to report back to Jenny. The reward for completing this bounty is
 10,000 and a Bright Powder.
 - Buy an HP Up: This bounty requires you to go to the nearby Department Store and purchase an HP Up. The HP Up however doesn’t require buying one and can be obtained from other sources. It will be removed from your inventory when completing the quest. The reward for completing this bounty is
 14,000, resulting in a net gain of
  6,000 if the HP Up was purchased.
Gym
As a Grass-type specialist, Fire and Flying-type Pokémon will be the most type-advantageous against her lineup. Growlithe and Vulpix are the most handily huntable Fire-type Pokémon to deploy against her, as they spawn on the contiguous routes.
Since all her Pokémon are also dual-types with a secondary type of Poison, it would also be judicious to entertain the deployment of Pokémon and moves that are type-advantageous against it, such as the Psychic.
|
|||||||||||||||||||||||||||||||||||||||||||||||||||||||||||||||||||||||||||||||||||||
|---|---|---|---|---|---|---|---|---|---|---|---|---|---|---|---|---|---|---|---|---|---|---|---|---|---|---|---|---|---|---|---|---|---|---|---|---|---|---|---|---|---|---|---|---|---|---|---|---|---|---|---|---|---|---|---|---|---|---|---|---|---|---|---|---|---|---|---|---|---|---|---|---|---|---|---|---|---|---|---|---|---|---|---|---|---|
|
|||||||||||||||||||||||||||||||||||||||||||||||||||||||||||||||||||||||||||||||||||||
|


After you beat her you are given the Rainbow Badge which gives you access to trading with other players. This opens the option to do evolutionary trades which can be useful later on.
You can also buy TM21 (Mega Drain) from the man at the front of her gym.
Exit the gym and you can head back to Lavender Town.
Lavender Town
Poké Flute
When you arrive at Lavender Town the first thing you should do is snoop around Mr. Fuji’s house. There will be some notes on his desk; interact with them and continue to Lavender Tower.
Enter Lavender Tower and work your way to the top floor. You won’t need to worry about going back to heal your Pokémon as halfway up there is a Nurse Joy.
When you get to the 6th floor you will have to use the Silph Scope to reveal the spirit of a Marowak which is blocking your path.
You can’t catch it so once you defeat it move on to the 7th and final floor. There you will have to defeat a few Team Rocket Grunts and save Mr. Fuji. Once you save him he will reward you with the Poké Flute.
Leave the tower and return to Mr. Fuji’s house and engage in some dialogue with him. When he is finished talking you can go South of Lavender Town to Route 12.
Route 12, 13, 14 & 15
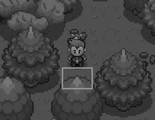
Follow Route 12 South until you find the sleeping Snorlax. Use the Poké Flute to wake it up and try your best to capture it.
Once you either defeat or capture it you can now use the stophouse to the left for a faster way to get to Vermilion City.
On the upper floor of the Route 11 stophouse, there is another Oak’s aide who will give you Dig after you capture 30 different Pokémon.
Continue South on Route 12 until you reach a small patch of grass. There is a hidden Rare Candy here that respawns once every 14 days.
-
Hidden Rare Candy
Pick it up and continue the wooden path to Route 13. On Route 13 there is a large maze with a lot of trainers in it and at the end of it, Berry Tower.
You can battle in Berry Tower and win… you guessed it, berries.
If you don’t need berries then continue the path South to Route 14.
Tips: It is recommended to catch a Ditto, which will be useful in Vermilion City — Simon’s House.
Then finally follow Route 15 West until you reach Fuchsia City.
Fuchsia City
Before you leave Fuchsia City, make sure to visit the Fishing Guru’s house where you can purchase the Good Rod for  15,000. You must have the Old Rod first in order to buy the Good Rod.
Gym
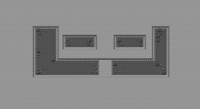
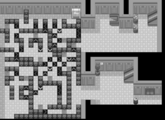
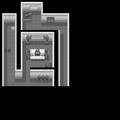
In order to reach Janine, you will need to navigate your way through an invisible maze, battling a gauntlet of Janine impostors thereto. The barriers that you need to pass through are invisible; see the pictorial guide to the right to know the pathway you need to tread through.
-
All the red-highlighted areas are impassable, marking the invisible barriers.
Janine specializes in Poison-type Pokémon.
While common sense dictates to preparatively strategize against the Poison-type weaknesses, it is worth noting that part of her lineup is comprised of Bug-type Pokémon, too; as such, it is advisable to consider deploying Fire and Psychic-type Pokémon and moves against it. Ground-type Pokémon and moves should be disconsidered, since most of her Pokémon are immune to it due to Fly-typing and the Levitate ability.
Tips: It is recommended to train your Pokémon up to around level 55.
|
|||||||||||||||||||||||||||||||||||||||||||||||||||||||||||||||||||||||||||||||||||||||||||||||||||||||||||||||||||||||||||||||||||||||||||||
|---|---|---|---|---|---|---|---|---|---|---|---|---|---|---|---|---|---|---|---|---|---|---|---|---|---|---|---|---|---|---|---|---|---|---|---|---|---|---|---|---|---|---|---|---|---|---|---|---|---|---|---|---|---|---|---|---|---|---|---|---|---|---|---|---|---|---|---|---|---|---|---|---|---|---|---|---|---|---|---|---|---|---|---|---|---|---|---|---|---|---|---|---|---|---|---|---|---|---|---|---|---|---|---|---|---|---|---|---|---|---|---|---|---|---|---|---|---|---|---|---|---|---|---|---|---|---|---|---|---|---|---|---|---|---|---|---|---|---|---|---|---|
|
|||||||||||||||||||||||||||||||||||||||||||||||||||||||||||||||||||||||||||||||||||||||||||||||||||||||||||||||||||||||||||||||||||||||||||||
|


After you beat her you will be rewarded with the Soul Badge. You can also TM06 (Toxic) upon reaping the Soul Badge. He sells one for  2,500.
HM03 (Surf)
When you leave the gym walk south until you meet Victor on the beach. Battle him and he will tell you where to find HM03 (Surf). You can also teach any Pikachu Surf, if and only if you chose Pikachu as your starter.
Head to the Northside of Fuschia and enter the Safari Building. Here you can pay  5,000 for 20 minutes of Safari time.
When you are teleported to the Safari Entrance go to Safari Area 3.
-
Safari Entrance
-
Safari Area 1
-
Safari Area 2
-
Safari Area 3
-

Safari Exclusive
(You can enter the Safari Exclusive Area if you bought a Membership to PRO.)
When you get there, enter the house and HM03 (Surf) will be waiting for you on the wooden table.
Now that you have HM03 (Surf) you can either use up the rest of your Safari time looking for rare Pokémon or you can use an Escape Rope to be teleported to your last used Pokécenter.
Saffron City
Journey to Saffron
From Fuchsia City you can either :
- Head West to Route 18 and follow the Bike Route to Celadon City (Require the Bike Quest to be completed to enter this area).
- Head East and go back to Lavender Town
When trying to enter Saffron City you will be told by the stophouse guards that they will only let you pass if you give them some Lemonade.
To get the Lemonade you will have to return to Celadon City and go to the Celadon Department Store . Go to the top floor of the Mart and purchase one Lemonade from the vending machine.
Before you leave the Celadon Mart you can talk to this Thief and complete his side-quest to unlock TM46 (Thief).
Take the Lemonade to one of the stophouse guards and give it to him. He will tell the other guards to let you in in the future.
Saffron Dojo
The first thing you should do is visit the Saffron Dojo.
In there you can fight some trainers for some easy EXP and data-seen. At the ultimacy of battling through the gauntlet of trainers in the gym, you can challenge Koichi; if you win, you can select a freely claimable Hitmonlee (on the right) or Hitmonchan (on the left).
After you are done here you can progress to Silph Co.
Note: Make sure to be over-leveled or bring some potions as he seems to cause some issues for many players.
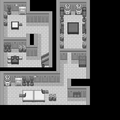
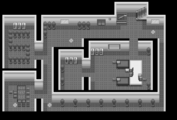
Silph Co.
After absconding from their hideout in Celadon City Gaming Corner, Team Rocket commandeered Silph Co. as their new operational base, subjugating all employees within it. You will be required to fend off all the Team Rocket agents and scientists before Saffron Gym is accessible, thereby stipulating the building’s mini-quest as a prerequisite for progressing in the regional storyline.
-
Silph Co. 1F
-
Silph Co. 2F
-

Silph Co. 3F
-
Silph Co. 4F
-
Silph Co. 5F
-
Silph Co. 6F
-
Silph Co. 7F
-

Silph Co. 8F
-
Silph Co. 9F
-
Silph Co. 10F
-
Silph Co. 11F
When you arrive at Silph Co. your first impression might be that you have to spend 20 minutes spamming warp panels until you get it correct. However, this isn’t the case as a matter of fact, you only need to use 2 warp panels to get to Giovanni. But It is highly recommended taking your time and battling all the Team Rocket Grunts to gain as much EXP as you can.
Once you feel that you are ready then go to the 3rd floor and take the center-most warp panel. Then take the next panel opposite the table (7F) and you will be translocated onto 11F wherein Giovanni’s commandeered office is reachable.
Green
Before reaching Giovanni, Green, the classic rival of Red, will be blocking the path. He must be battled so that he leaves the way. His Pokémon are estimated to be level 50.
|
|||||||||||||||||||||||||||
|
|||||||||||||||||||||||||||
|
|||||||||||||||||||||||||||
|
|||||||||||||||||||||||||||
|
|||||||||||||||||||||||||||
|
|||||||||||||||||||||||||||
|


Giovanni
This will segue into your second battle with Giovanni, so ensure that you have assembled the most conducive lineup that you can cobble before you tread to him.
Thereupon defeating Giovanni, he will once again abscond the base, and his droves of Team Rocket subordinates will follow suit, thereby liberating Saffron City of their takeover; consequently, Saffron Gym will become accessible.
|
|||||||||||||||||||||||||||
|
|||||||||||||||||||||||||||
|
|||||||||||||||||||||||||||
|
|||||||||||||||||||||||||||
|
|||||||||||||||||||||||||||
|


After defeating him, speak to the chairman northwards; he will gratitudinously give three Rare Candies for repelling off Team Rocket.
Gym
Sabrina, as a Psychic-type specialist : Dark, Bug, and Ghost-type Pokémon are most recommendable.
To most the Saffron Gym puzzle can be both confusing and frustrating, it’s almost as bad as Vermilion’s puzzle. However, similar to the Silph Co. warp pads the fastest way to Sabrina is to simply follow these directions: Up -> Down -> Down -> Left.
Tips: It is recommended to train your Pokémon up to around level 65.
|
|||||||||||||||||||||||||||||||||||||||||||||||||||||||||||||||||||||||||||||||||||||||||||||||||||||||||||||||||
|---|---|---|---|---|---|---|---|---|---|---|---|---|---|---|---|---|---|---|---|---|---|---|---|---|---|---|---|---|---|---|---|---|---|---|---|---|---|---|---|---|---|---|---|---|---|---|---|---|---|---|---|---|---|---|---|---|---|---|---|---|---|---|---|---|---|---|---|---|---|---|---|---|---|---|---|---|---|---|---|---|---|---|---|---|---|---|---|---|---|---|---|---|---|---|---|---|---|---|---|---|---|---|---|---|---|---|---|---|---|---|---|---|---|
|
|||||||||||||||||||||||||||||||||||||||||||||||||||||||||||||||||||||||||||||||||||||||||||||||||||||||||||||||||
|


After beating it you will be rewarded with the Marsh Badge and you’ll be able to purchase TM29 (Psychic) from the man at the front of the gym.
Take the left warp pad in Sabrina’s room to go to the entrance of the gym.
Cinnabar Island
Journey to Cinnabar
There are two ways that you can travel to Cinnabar Island from :
- You can surf either South from Pallet Town or Southwest from Fuschia.
- If you surf from Pallet Town then you’ll encounter a few trainers and eventually arrive at the North side of Cinnabar.
- If you surf from Fuschia, however, you will have to go through the Seafoam Islands.
- You can also surf Southeast from Fuschia to start the free Arcanine Mount Quest.
Cinnabar Mansion
Cinnabar Mansion, more commonly known as Pokémon Mansion, is a derelict, incinerated mansion found on this island. Despite its decrepitude, it is still bustled with wild Pokémon, conducing it as a popular pre-Blaine training area and general hunting area for a bevy of the rarer Fire-type Pokémon.
This mansion is antecedently accessed before Cinnabar Gym is accessible, as the gym’s key is sequestered in this mansion.
-
Cinnabar Mansion 1
-

Cinnabar Mansion 2
-
Cinnabar Mansion 3
Enter the Mansion and go to the second floor. From there you should take the staircase on the Northside of the second floor. When you reach the 3rd floor you are given the option to enter one of five doors. Each one will lead you to a different location in the mansion; some lead you outside of the mansion.
You must walk on the right side of the left exit after Youngster Wayne and you will fall directly inside of the key’s room.
You can now talk to the guard outside of the gym and he will leave, allowing you to pass.
Gym
Blaine specializes in Fire-type Pokémon.
As the most advantageous counterforce against Fire-type Pokémon, conventional wisdom dictates that Water-type should be culled for the battle. If there is a dearth of Water-type-type Pokémon in your possession, they can be cobbled together locally by surfing and fishing, as they ambiently inhabit Cinnabar Island and the contiguous water routes.
Rock-type Pokémon are additionally practicable, especially against his Charizard where they are doubly advantageous against its dual type.
Tips: It is recommended to train your Pokémon up to around level 75.
|
|||||||||||||||||||||||||||||||||||||||||||||||||||||||||||||||||||||||||||||||||||||||||||||||||||||||||||||||||||||||||||||||||||||||||||||
|---|---|---|---|---|---|---|---|---|---|---|---|---|---|---|---|---|---|---|---|---|---|---|---|---|---|---|---|---|---|---|---|---|---|---|---|---|---|---|---|---|---|---|---|---|---|---|---|---|---|---|---|---|---|---|---|---|---|---|---|---|---|---|---|---|---|---|---|---|---|---|---|---|---|---|---|---|---|---|---|---|---|---|---|---|---|---|---|---|---|---|---|---|---|---|---|---|---|---|---|---|---|---|---|---|---|---|---|---|---|---|---|---|---|---|---|---|---|---|---|---|---|---|---|---|---|---|---|---|---|---|---|---|---|---|---|---|---|---|---|---|---|
|
|||||||||||||||||||||||||||||||||||||||||||||||||||||||||||||||||||||||||||||||||||||||||||||||||||||||||||||||||||||||||||||||||||||||||||||
|


Defeating Blaine will give you the Volcano badge, you can also buy TM38 (Fire Blast) from the man at the front of his gym. You also gain access to the fossil recovery room at the Cinnabar Research Lab.
- A Move Tutor for Heat Wave can be found in Blaine’s room.
Cinnabar Lab
Finally, now that you’ve defeated the 7th gym you are allowed to enter the fossil recovery room at the Cinnabar Research Lab. From here you can revive any fossils that you pick up on your journey.
Cinnabar Lab serves as a polestar for various Pokémon professors and scientists that prefer to work seclusively, allowing them to work in an islanded environment from the rest of the region’s mainland.
Most notably, the lab is home to many NPCs of interest, two of which are important in obtaining particular Pokemons, most notably Fossil Pokémons and Porygon. However, the room in which those two NPCs are located in, Cinnabar Lab Room 3, will be blocked by a guard that will refuse to leave until the Cinnabar Gym has been completed.
In Cinnabar Lab Room 1, an NPC will evaluate the player’s Pokedex. Should the player have the caught data of over 100 Pokémons, he will offer a Silver Disc as a one-time reward.
Regardless of how the Silver Disc was obtained, Davis in Cinnabar Lab Room 3 will convert the Silver Disc into a Porygon of level 5, again with the requirement of over 100 caught data. This process will require him a random time of between 2 and 6 hours to complete, and so the player will be required to return the next day or later in order to claim the Porygon.
Viridian City Gym
When you’re done at Cinnabar Island you can head North to go back to Pallet Town. From there continue to head North to Viridian City.
If you were taking your time with the story that Rare Candy might’ve respawned. Anyways, go to the gym and enter it.
Despite Giovanni having 6 Pokémon with him, he will only use one. His armor-vested Mewtwo, Steel / Psychic-type.
Dark, Ground, Ghost and Fire-type Pokémon will be extremely useful in this battle.
Tips: It is recommended to train your Pokémon up to around level 85.
|
|||||||||||||||||||||||||||||
|---|---|---|---|---|---|---|---|---|---|---|---|---|---|---|---|---|---|---|---|---|---|---|---|---|---|---|---|---|---|
|
|||||||||||||||||||||||||||||
|


By beating Giovanni you are rewarded with the Earth Badge and access to the Kanto Elite Four. You can also buy TM26 (Earthquake) at the gym.
Giovanni will now disband Team Rocket and never be seen again.
Victory Road
To get to Victory Road you will have to head West of Viridian City, through Route 22. Talk to the guards outside of the reception and they will let you pass.
Once you’re inside, head North and meet Red. He will battle you and probably completely destroy you again, no money will be lost by lossssing against Red.
After the battle is over he will move and you’ll be free to go through Victory Road. Go through and beat all the trainers as you really need the EXP for the Elite 4.
As you make your way through and come to the exit you will encounter Moltres. Interact with it to initiate a battle. You can not catch Moltres in this combat.
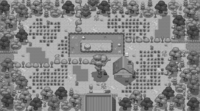
After you defeat it you can move through the exit and into the Indigo Plateau. Here you will see two buildings and Youngster Joey.
As you’re doing the Kanto Elite 4 you will need to go to the East building.
As you walk there you will be congratulated by all the Kanto Gym Leaders as well as your mother.
Now that you’ve beaten Victory Road it is time for you to train your Pokémon so they are ready for the Elite 4.
Use the exit of Victory Road as a hotspot for EXP.
Alternatively, you can travel back to Seafoam Islands and use the lower floors to level up your Pokémon.
Once each of your Pokémon reaches around level 90 you will be ready for the Elite 4. Gyarados and Gengar are recommend to make it easier.
Stock up on potions and revives and enter via the door at the back of the center.
Kanto Elite 4
Main article: Elite Four (Kanto)
The Kanto Elite 4 can be fought in the east building of Indigo Plateau. You must fight five difficult trainers, and it is suggested to bring a party of level 90 Pokémons to succeed in the challenge without spending too much money on healing items.
You will have to fight the five following trainers :
- Lorelei, Ice and Water-type master.
- Bruno, Fighting-type master.
- Agatha, Ghost and Poison-type master.
- Lance, Dragon-type master.
- Gary, the Champion.